In this article I will show you how to troubleshoot and resolve the error “The Software Change Returned Error Code 0x87d00669 In SCCM”
I have seen this error 0x87d00669 many times with my SCCM clients when they are trying to install software updates that have been pushed out via SCCM.
The error 0x87d00669 means “Not able to get software updates content locations at this time” The error will show as below

How To Troubleshoot Error Code 0x87d00669
To fix the 0x87d00669 error we first need to take a look at the logs on a client to find out where the root cause of the issue is.
Log on to a client that is having the issue and take a look at the below logs.
- C:\Windows\CCM\Logs\UpdatesHandler.log
- C:\Windows\CCM\Logs\DataTransferService.log
- C:\Windows\CCM\Logs\CAS.log
- C:\Windows\CCM\Logs\CLientLocation.log
If you see errors relating to downloading content make a note of the SCCM distribution point server as we will need that in the next step.
If you see issues relating to boundary groups we will need to check the boundary group setup.
Next we need to find out which software update is failing to install / download. On the client open software centre, click on updates or installation status and note down any updates that have failed. In the example below its “Update for Windows 10 Version 1703 for X64-based systems (KB4043292)”
If you see other updates with the status “Waiting to install” click on these as well, If they are showing Downloading 0% and not actually downloading then you will need to check these updates as well.

Resolving Error Code 0x87d00669 In SCCM
Now we have gone through the logs on the client and we now have an idea what the root cause of the issue is. Below I will go over the following fixes
- Check Content On Distribution Point
- Check Boundary’s Within ConfigMgr Console
- Increase Run Time Of A Software Update
The most likely issue is that the content on the SCCM distribution point is missing or corrupt so I will start with that fix.
Check Content On Distribution Point
In the client logs you should of found which distribution point is causing the issue for the client and also which software update they were trying to download.
We will now check the distribution point to make sure the content looks ok. To do this follow these steps.
- Open the ConfigMgr console
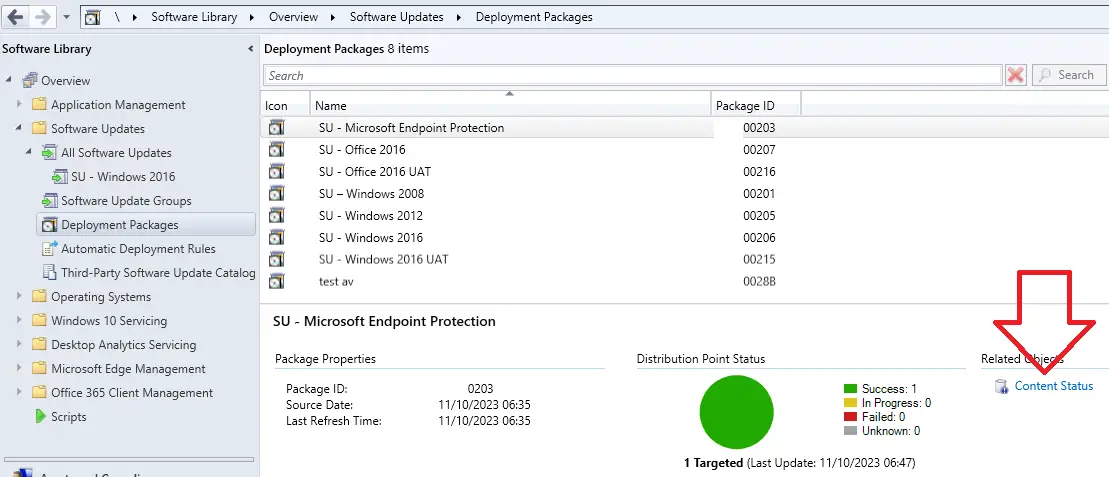
- Go to \Software Library\Overview\Software Updates\Deployment Packages
- Select the package that will have the update you are having issues with and click content status
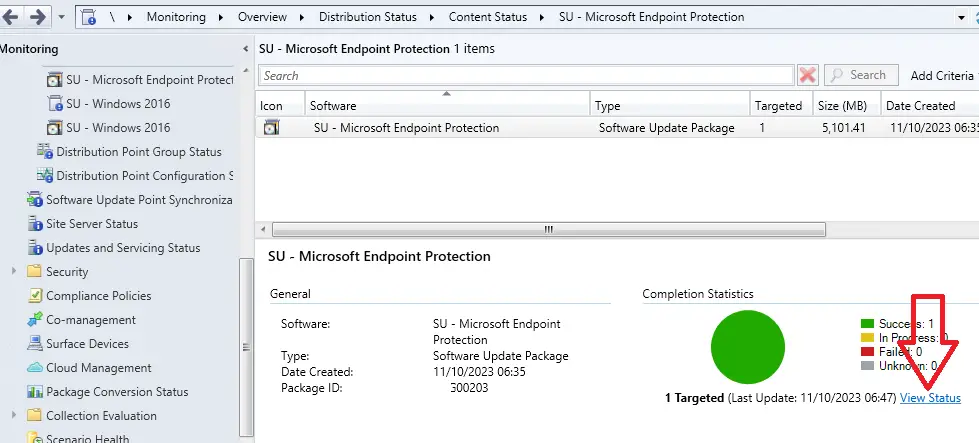
- Click View Status, bottom right
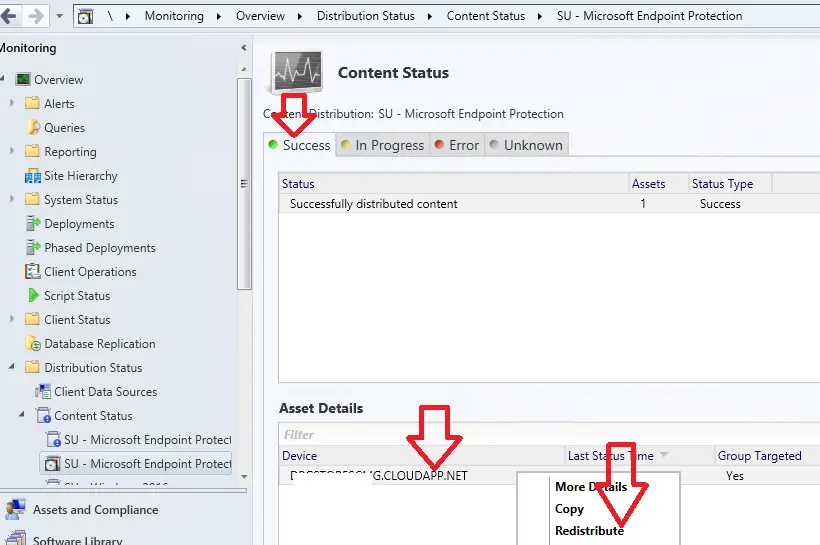
- Make sure you are on the Success tab, Confirm that the sccm distribution point shows under asset details. If it does right click on your distribution point and select redistribute. This will re-copy the updates to the distribution point.
- If your distribution point is not showing under the Success tab then go to \Software Library\Overview\Software Updates\Deployment Packages
- Right click on the required software update package and select “Distribute Content”
- Click Next
- Click add and add the required distribution point
- Click Next
- Click Next
- Click Close
- Wait for the package to copy to the distribution point
- Check the content is now copied to the distribution point (Step 5)


Check Boundary’s Within ConfigMgr Console
Another reason for the software update not downloading could be because there is no sccm boundary assigned to the client.
First thing you need to do is log on to the client to see if there are any errors relating to location / contacting MP / DP. Check the following logs
- C:\Windows\ccm\logs\ClientLocation.log
- C:\Windows\ccm\logs\LocationServices.log
On the client do an ipconfig to get the ip of the client. Then we need to check the boundary groups within the sccm console.
- Open the ConfigMgr console
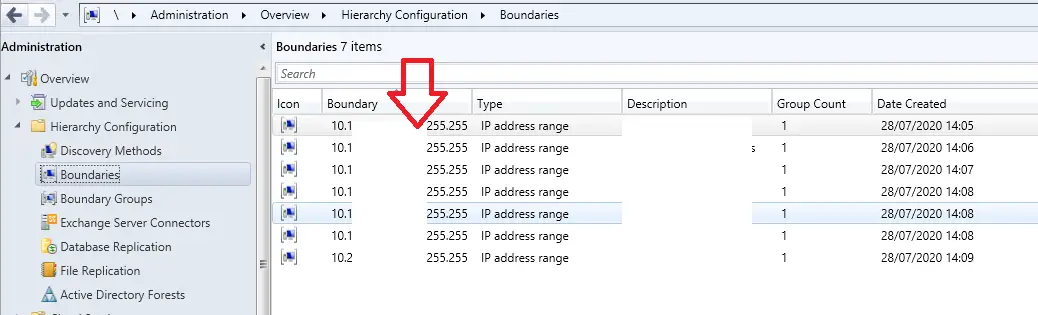
- Go to \Administration\Overview\Hierarchy Configuration\Boundaries
- Confirm you can see a boundary group for the ip of the client
- Go to \Administration\Overview\Hierarchy Configuration\Boundary Groups
- Right click on your boundary group and select properties
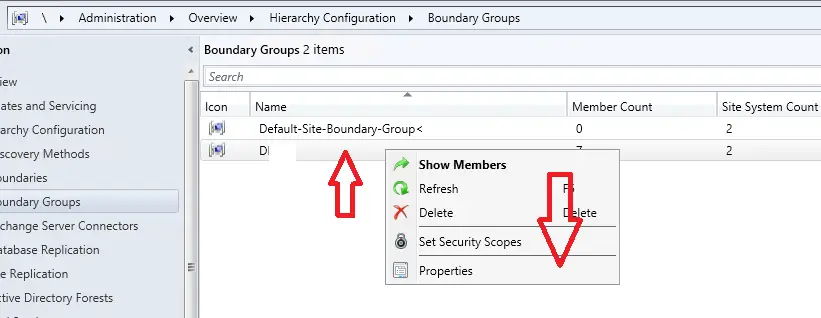
- Under the general tab, Confirm your boundary is added under boundaries
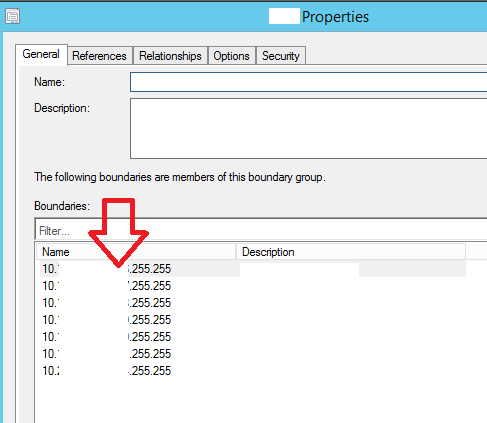
- If they are missing click the add button
- Click the references tab
- Confirm “Use this boundary group for site assignment” is ticked
- Confirm your distribution point is added to the site system server list
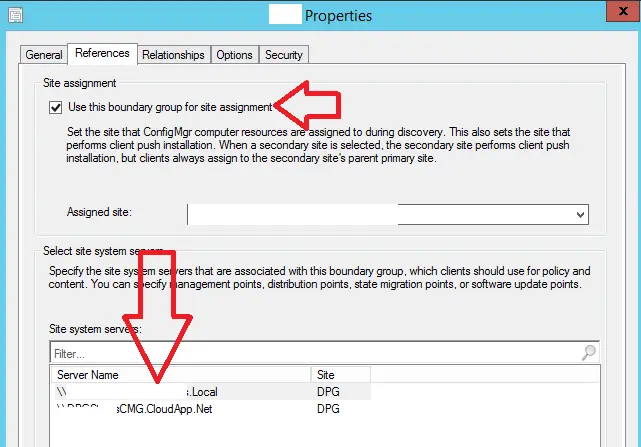
- Click ok


Increase Run Time Of A Software Update
Next we need to do is find out what update is causing the error then increase the run time within the SCCM console.
To do this follow these steps.
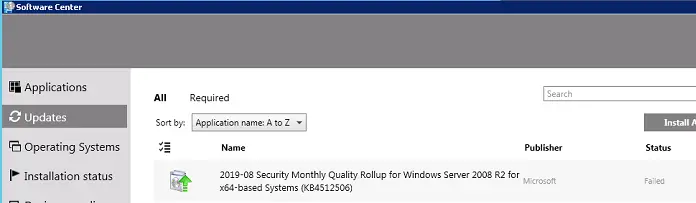
- On the machine that is having the issue open up software manager and click on updates.
- In this window you should see the updates with a status of failed. Note down the KB number (In the example below its KB4512506)
- Now log on to the SCCM server and open the ConfigMgr console
- Go to Software Library > Overview > Software Updates > All Software Updates
- Search for the required update.
- Right click on the required update and select properties.

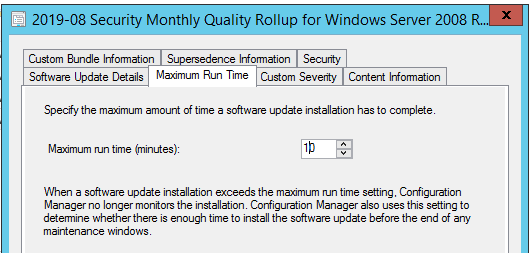
- Click on the Maximum Run Time tab, usually the error is because the run time is set to 10 minutes.
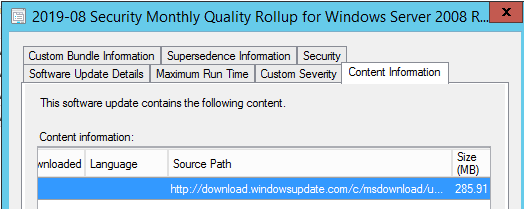
- Now click on the content information tab. Take a look at the size of the update (Below it is 285.91mb). The issue is usually caused because there is not enough maximum run time configured for the client to download and install the update.


Hello, I am the owner of this site. I have 25+ years experience of IT. Check us out on the below social platforms.