 In this article I will show you how you can remove maintenance windows on multiple collections in SCCM via powershell. This can save you a lot of time if you have multiple windows to remove from multiple collections.
Using powershell in Configmgr you can remove maintenance windows from collections by using the Remove-CMMaintenanceWindow command.
Below I will show you how to create a script to remove multiple maintenance windows at the same time.
Please Be Aware : If you remove a maintenance window and there is a software application / update waiting to install, the software will install as soon as the maintenance window it removed.
How To Check Existing Maintenance Windows
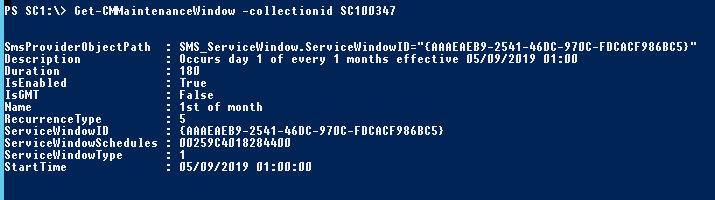
If you want to check what maintenance windows are currently in place for a collection you can use the Get-CMMaintenanceWindow command. To use this command do the following
- Open System Center Configuration Manager
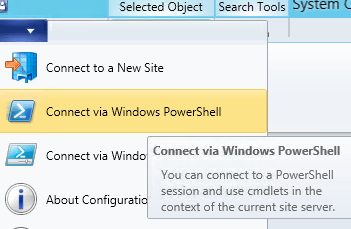
- Left click the top arrow and select Connect via Windows Powershell
- In the powershell window type in Get-CMMaintenanceWindow -collectionid %COLLECTIONID% (To get the collection ID browse to the required collection and right click on it and select properties. The collection ID will be shown at the bottom of the window.
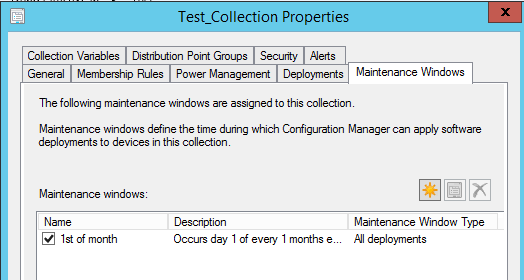
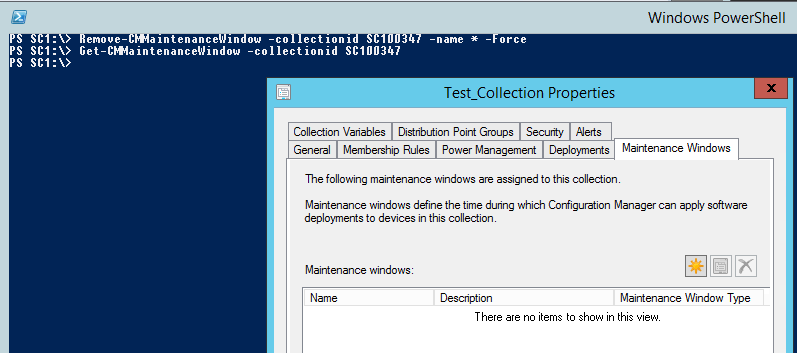
- You can also see the maintenance windows via the gui by browsing to the collection ID and right click > properties > Maintenance window tab


TIP : If you want to check maintenance windows for multiple collections in one go it is much faster to do it via the powershell command.
How To Remove Maintenance Windows on Collections in SCCM Via Powershell
To remove a maintenance window on a collection in SCCM we are going to use powershell with the Remove-CMMaintenanceWindow command.
- Collect all the collections IDs you want to remove the maintenance windows for. To get the collection IDs open Configuration Manager (Configmgr) and browse to Assets and Compliance > Device Collections > Right click on the required collection and click properties.
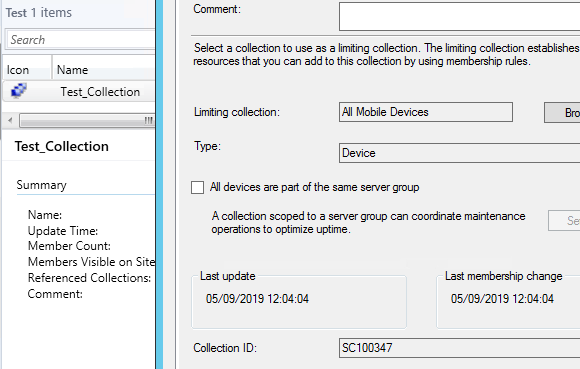
- The collection ID will be shown at the bottom of the window, it will start with SC.
- In Configuration Manager left click the top arrow and select Connect via Windows Powershell
- Type in Remove-CMMaintenanceWindow -collectionid %COLLECTIONID% -name * -Force This will now remove all maintenance windows with out prompting you

- Now run Get-CMMaintenanceWindow -collectionid %COLLECTIONID% to make sure the maintenance window has been removed
- If you want to remove more than one maintenance window at a time we can create a script to do this. Open Windows Powershell ISE and paste the command Remove-CMMaintenanceWindow -collectionid %COLLECTIONID% -name * -Force as many times as needed (Replacing %COLLECTIONID% with the correct ID.)
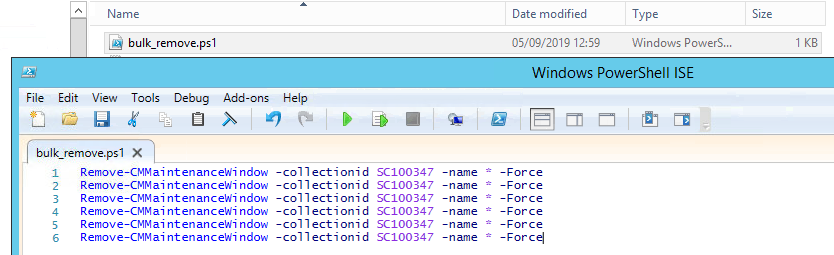
- Save the file making sure it is saved with the .ps1 file extension.
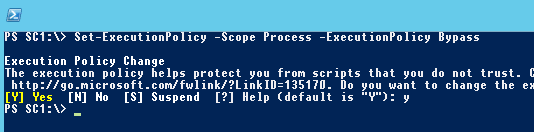
- Head over to the powershell window we opened via configuration manager. Type in Set-ExecutionPolicy -Scope Process -ExecutionPolicy Bypass and hit enter. Select y
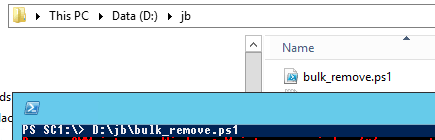
- Type in the path of the file we just created
- Now run Get-CMMaintenanceWindow -collectionid %COLLECTIONID% to make sure the maintenance window has been removed


If you have any questions on this process please post about it in a comment below.

Hello, I am the owner of this site. I have 25+ years experience of IT. Check us out on the below social platforms.